A sample text widget
Etiam pulvinar consectetur dolor sed malesuada. Ut convallis
euismod dolor nec pretium. Nunc ut tristique massa.
Nam sodales mi vitae dolor ullamcorper et vulputate enim accumsan.
Morbi orci magna, tincidunt vitae molestie nec, molestie at mi. Nulla nulla lorem,
suscipit in posuere in, interdum non magna.
|
Shanne asks: I made this recipe (the banana blueberry version) but I substituted buttermilk for the milk. They ended up tasting like they had a horrible baking soda overload. I believe that I did not double the baking soda…of course, it is possible but I am generally careful about those things. Could the buttermilk have caused the baking soda to “over-react”? I made some other substitutions to the recipe but nothing “chemical” in nature. (Coconut oil instead of canola, brown rice flour instead of wheat, and ground flax/oat flour instead of oat bran.) I’ve made this recipe before and they were fine. Also, they “sunk” in the middle this time. It is so weird as I have never had this happen before in my baking. I’m very curious to know what caused this. If it was a momentary “brain cramp” then I know I have to be more careful in the future!
Thank you for your input!
Baking S.O.S. says: Substituting buttermilk for milk will definitely affect the chemical makeup of the muffin batter. Buttermilk is much more acidic than milk, so it reacts differently with the chemical leaveners in the recipe–the baking soda and baking powder. And when the chemical reaction is altered, it can create a metallic or bitter taste in your finished product. Also, altering the chemical reaction that causes the product to rise can also cause the product to sink in the middle once it comes out of the oven (as you said your muffins did).
Because buttermilk is acidic, it needs an alkaline leavener–specifically baking soda–to create the chemical reaction that makes a baked good rise.
Baking powder contains both acidic and alkaline ingredients to create chemical leavening all on its own–without any acidic ingredients needed in the recipe.
Since you introduced more acidity into the recipe with buttermilk, you should not need as much baking powder to make the muffins rise. (too much baking powder caused the metallic, bitter taste in this case)
The general rule of thumb for chemical leavening is: use about 1 tsp. of baking powder OR 1/4 tsp. of baking soda per 1 C. of flour in a recipe.
Given that the original recipe calls for oat and wheat brans in place of what would otherwise be flour (for dry ingredients), and since you altered the dry ingredients even further by using different flours and brans, it would be extremely difficult to advise you exactly how much baking soda you would need with all the different substitutions being made. All I can suggest is that you keep trying different variations until you achieve the desired results you are looking for–but expect to encounter several “mishaps” before you find the right combination of ingredients that work.
You could start by eliminating the baking powder all together and see what happens. If that doesn’t make the muffins rise enough, trying adding baking powder back in in smaller amounts–maybe 1/4 tsp. or 1/2 tsp. rather than the full 1 tsp. the recipe calls for.
Good luck with the experimentation!
Menakshi asks: I have a problem and am desperately looking for an answer. I am an amateur baker who is trying to bake without eggs. My problem is that my cakes come out of the oven perfect, but after cooling down, they are dense and heavy. I am also selling some cakes, but the general reviews are that they are tasty but hard (not hard as in difficult to cut the cake, but I am guessing what they are trying to say is that they are not as light, fluffy or soft as cakes with eggs). Are eggless cakes suppose to be dense? Is there a solution?
Can you suggest some recipes without eggs?
Baking S.O.S. says: I do not have much experience baking without eggs–I am not a vegan. But luckily, my boss’s sister IS a vegan, and she is also a nationally-famous vegan cookbook author, too.
So I am going to refer you to the Post Punk Kitchen blog where Isa Chandra Moskowitz gives plenty of advice on how to replace eggs in baked goods. She has some good recommendations here, so I would trust the expert vegan baker much more than myself!
Lastly, Isa has an entire cookbook dedicated to vegan cupcake recipes called Vegan Cupcakes Take Over the World. I have perused the book, and the recipes look beautiful and delicious, though I have never made any myself. Still, I have it on good authority from my boss that Isa’s recipes are fantastic! So you could certainly use any of the recipes in the cupcake cookbook to make regular-size cakes. It is still cake batter–the only difference is the size of the pan you put it in.
Good luck!
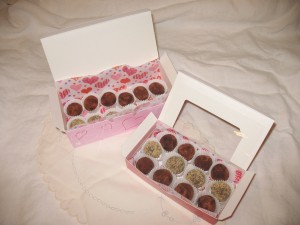 coated in bittersweet chocolate cocoa or finely chopped, toasted almonds Last night, I taught a Handmade Chocolates class at the Franklin Park Conservatory as part of their Food Education classes. We made traditional Bittersweet Chocolate Truffles and Chocolate-Dipped Strawberries.
The Handmade Chocolates class is always popular at Valentine’s Day, so in the spirit of the season, I share my recipe for you here. Enjoy!
Traditional Chocolate Truffles
Yield: approx. 3-4 dozen truffles
Ingredients
1/3 C. heavy whipping cream
6 Tbls. unsalted butter, cut into small pieces
2 C. (one 12-ounce bag) semi-sweet or dark chocolate chips (I prefer dark or bittersweet chocolate for this recipe)
Coating:
1/3 C. Dutch-processed cocoa powder
OR
1/3 C. almond meal, lightly toasted in a 350-degree oven for 5 minutes
Directions:
1. Place the chocolate chips in a medium stainless steel bowl.
2. Place the cream and butter in a small saucepan. Bring to a simmer over medium-high heat, just until bubbles form around the edges and steam arises from the pan. [This is called “scalding” the cream.] *Be careful not to let the cream boil—it will spill over the edge of the pan!
3. Pour cream mixture over the chocolate chips. Cover with plastic wrap and allow to sit for 5 minutes so the chips can melt.
4. Stir with a wire whisk until completely smooth. NOTE: If chocolate does not melt completely, set the bowl over a pan of barely simmering water to create a double boiler. Continue stirring with whisk until mixture is complete smooth.
5. Remove bowl from double boiler. Cover with plastic wrap (works best when the wrap touches the surface of the chocolate directly) and refrigerate until firm, 1-2 hours.
6. Scoop and roll the mixture into 1-inch balls.
7. To coat the truffles, place the cocoa powder (or almond meal) in a small bowl. Roll each ball in the coating and transfer the truffles to a tray or container lined with waxed paper. Separate layers with additional waxed paper.
8. Cover tightly and refrigerate up to 2 weeks or freeze up to 3 months.
Note: Chocolate truffles taste best when served at room temperature. Allow them to warm to room temp. before serving.
Alma asks: I baked a moist 7-Up pound cake, but it turned out a disaster!!! The measurements I followed are:
3 C. all purpose flour
3 C. sugar (I used half the sugar)
5 eggs
1 C. Sprite (no 7-up available)
1 T. vanilla
Bake in 325 oven for 60+10 mins (1 hr.+10 mins). That was the recipe on YouTube I saw.
I preheated my oven @ 190 degree Celcius for 10 mins. I used a round cake pan (8 in. by 2 in.) and baked it for 60 mins+10 mins. Inside the oven, the cake was rising, but when my oven bell rang, I turned off the oven and took out my baked caked. It was heavy, unevenly cooked: toasted on the outside, uncooked inside. What do you think would be the cause of this??? Was it the oven? The mixing method? My oven is a toaster oven with rotisserie. Please help. I am desperate to bake a cake for my coming birthday.
Baking S.O.S. says: There are any number of things that could have gone wrong with your cake, but my guess is that the biggest problem was trying to bake a cake in the toaster oven, especially if the oven were set to “toast” rather than “bake” by mistake.
But let’s start from the beginning: The recipe itself could be part of the problem. If you have never made a recipe before, then you don’t know whether the recipe actually works or not. I have tried plenty of new recipes that I did not like the results, so rather than trying to make those recipes work, I simply scrap the recipe and move on to another one until I find one that produces the results I like.
In this case, the recipe does not call for any leavening agent to make it rise, such as baking powder or baking soda. Although traditional pound cake is made without any leavening agent, many recipes will call for some baking powder to help it rise a little bit. Since this recipe does not call for any baking powder or baking soda, that would explain why the cake sank after you removed it from the oven. There was nothing in it to make it rise and stay risen.
Also, since you cut the amount of sugar in half, that is going to affect the overall results, as well. Sugar provides not only sweetness, but some moisture to the cake, and it also helps the cake to brown evenly. Sugar caramelizes as it bakes, giving baked goods that lovely golden color. When you cut the sugar in half, it will certainly affect how your cake turns out. I always say that baking is a science: you must follow the recipe exactly the first time you make any recipe so that you know how it is supposed to turn out. Then you can experiment with adjusting ingredients to your own preferences.
Back to the problem of the toaster oven: You said your cake was baked unevenly–done on the outside, but not on the inside. My guess is that toaster ovens are not really designed to handle big baking projects like baking full-size cakes for over an hour. I cannot say from my own experience, but it seems as though toaster ovens are designed for smaller jobs–smaller items and baking for less time. Perhaps the toaster oven could not hold a consistent temperature for over an hour of baking time or when it was full of cake pans. If you have access to a conventional oven–even at a friend’s house–I would recommend baking your cake in a conventional oven.
Lastly, if your cake wasn’t fully done in the center at the end of the baking time, you can always leave it in longer and continue testing for doneness. The best way to tell if a cake is done all the way through is to insert a wooden toothpick in the center. If it comes out with wet cake batter, bake it longer. If it comes out clean or with dry cake crumbs on it, it is done.
Happy Birthday to you!
Ayush says: I’ve tried an egg-less chocolate cake many times but it is not doing nicely. Every time it turns hard or rubbery. Also it sinks down after rising before it can set. I make it in a convection microwave oven. Can you please help me so that i can get it right?
Baking S.O.S. says: I don’t have a lot of experience baking without eggs, but I can try to give you a few suggestions. Perhaps there might be something that you haven’t yet tried.
First, I don’t like to bake cakes in convection ovens because the movement of the fan causes the fragile cake batter to sink and fall. This could be part of the problem that is causing your cake to sink. If you have a standard conventional oven, or if you can turn the convection feature off, I would recommend baking your cake in a conventional oven.
Secondly, are you baking a cake recipe that is formulated to be baked without eggs? Or are you simply eliminating eggs from a standard cake recipe? If so, are you substituting anything else in place of the eggs?
If you simply eliminate the eggs from a cake recipe, that would explain why your cakes are turning out dense and rubbery. To make an egg-less cake, you would either need to find a recipe that is formulated to be baked without eggs, or you would need to use some kind of a substitute for the eggs. Eggs perform a number of important functions in baked goods, so it generally doesn’t work to simply eliminate them from a recipe. You need to substitute something else.
There are several egg replacer products, including: Bob’s Red Mill Egg Replacer and Ener-G Egg Replacer.
You can also use finely ground flax seed combined with water as a substitute for eggs. The formula is: 1 Tbsp. of ground flax seed + 3 Tbsp. water = 1 egg
Lastly, I have baked delicious chocolate cake recipes that use mayonnaise or Miracle Whip in place of the eggs. (just read the label carefully to make sure that the mayo doesn’t contain eggs in it) You could do a quick Internet search for chocolate mayonnaise cake recipes, or try this one here at allrecipes.com: Chocolate Mayo Cake. Good luck!
Terry asks: I would like to bake some cookies for Christmas and I’m confused. I haven’t baked for many years, and the recipes call for butter and Crisco. I have the butter, but I don’t have the Crisco. Could I substitute all butter? I want to bake: thumb prints, snow balls, twice-baked cookies, oatmeal, and several others. I would appreciate your help.
Baking S.O.S. says: Sure, you can certainly substitute butter equally (meaning use the same amount) in place of Crisco in cookie recipes. In fact, I prefer the taste of all butter over vegetable shortening.
There was a time when it was believed that vegetable shortening was actually better for your health than butter, so many old cookie recipes call for vegetable shortening for at least part of the fat. But now that we know that hydrogenated oils are actually worse for our health than butter, there has been a shift back to baking with all butter. So it’s perfectly fine to make that adjustment yourself, regardless of what the recipe calls for.
Here’s what might happen if you bake with all butter instead of half butter/half Crisco: Butter contains about 20% water, so as it heats and the butter melts, it tends to spread more, making your cookies thinner & flatter.
Vegetable shortening does not make cookies spread as much, so the benefit to using shortening is that cookies will be more puffed and thicker.
To prevent cookies from spreading as much, I always bake on parchment paper, so that can help alleviate some of the spreading when you bake cookies with all butter, and you will have cookies that taste better, too! (Vegetable shortening has little to no flavor.)
I will say that I have a few recipes that I still prefer the results of baking with vegetable shortening over butter, but the only way to know is simply to try both ways. With the cookies you listed, it sounds like you will be fine baking with butter.
Happy holiday baking!
Ann Louise asks: With Christmas coming I am really desperate for helpful advice on what I’m doing wrong when baking the sponge cake for my trifle. I have always used the trifle recipe from The Joy of Cooking book, which I’ve had since 1979, although I’ve only begun using that particular recipe in the past few years. I always thought that the cake was o.k. until I tasted my friend’s trifle when we were at her place for Christmas last year. The cake in her trifle was moist with a fine grained texture whereas mine always comes out dry and full of large air holes. When I asked her for the recipe, she said it was the same one that I use from the Joy Of Cooking Book, but our cakes differ like night and day, and I was too embarrassed to let her know this. I’ve gone over the recipe and my method repeatedly but I can’t seem to figure out what I’m doing wrong. The recipe calls for whisking the eggs and sugar over simmering water until warm, and then beating them for 15 minutes until triple in volume. At this point, when I am whipping them for 15 minutes, the mixture is full of large pockets of air, whereas I’ve seen during a YouTube video of sponge cake making that the batter is relatively smooth with very little bubbles of air. What am I’m doing differently to create such an opposite result in my sponge cake? I would love to be able to master this cake so the trifle I serve my family this Christmas will be as delicious as my friend’s, but I need help deciphering what I’m doing wrong.
Baking S.O.S. says: Sponge cake is supposed to be dry by nature. If your sponge cake turns out dry, then it is probably turning out right.
Sponge cake is more commonly made in Europe, where desserts tend to be less sweet and less laden with buttery fat, as our desserts in America are. If you are expecting your sponge cake to turn out like a typical American butter cake, you will be disappointed because it will never be so, based on the ingredients in the recipe.
As for the large air holes from the whipped egg whites, that is the only thing that make a sponge cake rise. If you do not whip enough air into the egg white-sugar mixture, then the cake will not rise at all, so air holes are OK. To be sure that you are heating the egg whites & sugar enough before whipping them, try using a kitchen thermometer to take the temperature. They should reach about 117 degrees Fahrenheit before you remove them from the heat. Egg whites start to coagulate at around 120 degrees, so be careful not to let them get too hot!
So what is the secret to a moist sponge cake, you must be wondering? Simple syrup! The traditional preparation of a sponge cake is to soak it with some type of simple syrup–to give it extra flavor and moisture.
Simple syrup is equal parts of granulated sugar and water (ex. 1 cup sugar + 1 cup water) boiled together until the sugar dissolves. From there, you can add ANY kind of flavor imaginable. From something as simple as vanilla extra to various flavored liqueurs (which is the traditional preparation of a trifle)–almost anything goes.
So once you bake the sponge cake and allow it to cool, you then slice the cake into layers and brush each layer generously with a flavored simple syrup to give it moisture and additional flavor. Then follow your trifle recipe from there. I like to use homemade pastry cream and fresh fruit in my trifles–yummy!
But here’s my secret: I don’t even bother making sponge cake simply because it is dry, flavorless, and difficult to bake successfully without much practice or experience. I skip the sponge cake and simply make my favorite yellow cake recipe. We Americans like our cake to be tender and moist, so I go straight for the cake recipe I love best–no need to follow the trifle recipe exactly. The beauty of a trifle is that you can use ANY combination of cakes, flavorings, fillings, and toppings that you choose.
So if you don’t feel like fighting with the sponge cake recipe again and again, simply skip that step all together and try it with your own favorite cake recipe, instead. You can still soak the cake layers with some type of liqueur and/or simple syrup, if you like. (Here’s an interesting side note: Trifle is also called “tipsy pudding” because of the high alcohol content of the dessert!)
Kaylene asks: We made brownies tonight. The recipe calls for margarine, cocoa, sugar, eggs, vanilla, and flour. The only thing I did different was I used “I can’t believe it’s not butter”. It had a very strong metallic taste. We thought maybe the whisk we used was rusted so we dumped the whole thing and started over using only plastic and metal. We had the same results. This is a family recipe I have had many times, It is delicious. Please help. What am I doing wrong? We are baking to see if the taste bakes out.
Baking S.O.S. says: I am curious how the second batch turned out when you made it again without using the wire whisk. Did the metallic taste disappear?
You mentioned that you used “plastic and metal” in the second batch, so I am wondering if you baked the brownies in a metal pan? Could that potentially be the source of the metallic taste? I can’t imagine why it would, but you could try baking in a glass pan to see if that makes any difference.
My first instinct is to say that too much baking powder causes a metallic taste in baked goods, but you did not list baking powder in the list of ingredients. Does your recipe call for any baking powder or baking soda at all? If not, then that could not be the source of the problem.
And I do not have any experience baking with “I can’t believe it’s not butter!”, so I cannot say whether this would be the culprit of the metallic taste or not. I assume that margarines and butter substitutes that used to be made from hydrogenated vegetable oils have recently changed their formulas to somehow make their products without trans fats–since hydrogenated fats became undesirable as soon as manufacturers had to start labeling trans fats on their packages. So it is possible that “I can’t believe it’s not butter!” now behaves differently in baked goods than it used to because it is now made differently than it used to be.
You could try making your brownies with butter and see if that has any effect on the finished flavor and texture, too.
Let me know what you come up with–this is a perplexing problem!
Betty asks: I have made pound cakes for years but was trying a new recipe. I used loaf pans rather than a bunt pan. The cake separated from the pan and was very crumbly. I did use dark pans. Some of the recipes I have tried call for a combination of butter and Crisco, and others for just one or the other. What do they do differently to a cake?
Baking S.O.S. says: Pound cake gets its name from the fact that the recipe calls for 1 pound each of all the ingredients:
- 1 pound of flour
- 1 pound of sugar
- 1 pound of eggs, and
- 1 pound of fat–traditionally, it is made with all butter
That’s it. It’s a very simple recipe in it’s original form. But there are probably hundreds of variations out there because bakers have tweaked the original recipe over the years, putting their own twists on this classic cake. So the results that you get will vary a bit, depending on which recipe you follow and how much that recipe varies from the original.
I can’t tell you why the recipe you made was crumbly (without actually seeing the recipe’s ingredient list), but I do know from experience that I do not like the effect that teflon-lined pans have on baked goods. The dark coating attracts the heat of the oven, causing cakes to get very dark on the outside edges that come in contact with the pan (the bottom and sides). The results look and taste bad, so I no longer use non-stick coated pans for baking. I recommend a glass or plain metal loaf pan for baking pound cakes.
As for your other question: How do butter and Crisco affect the cake differently, the main difference is taste. Butter has a much richer flavor than Crisco, which is fairly neutral. So for a better flavor, I recommend using all butter.
But it is interesting that you asked because I was just talking to a co-worker about fat in pound cakes just the other day, so your timing is perfect! My co-worked is from the South, and she says that it is very common for Southern bakers to make pound cake with lard. She says lard gives pound cake a much denser, more moist texture. She herself likes to make pound cakes with a combination of butter and lard. So give that a try sometime if you would like to experiment with the different taste and texture qualities of different fats.
The best way to compare the differences would be to start with a very basic pound cake recipe–like the one above–and then try different variations on that same recipe, rather than trying completely different recipes. When you start with one standard recipe for your base comparison, you will have a better idea of how the changes in ingredients affect the overall flavor and texture of the cake.
Happy baking!
Arnulfo asks:I work as a pastry maker at Velvet Cupcakes and I am very frustrated to solve my problem on my cupcakes: sometimes not drying fast but it’s removing from the paper cups, and sometimes not separating from paper cups but it’s fast drying. This is my first time I encountered this oven. I am using a convection old oven before, and they bought a new electric operated convection oven with a steaming function, but I got the same results in my new oven. Could you give me some advice?
Baking S.O.S. says: I am not certain I fully understand the problems you are experiencing, but I will do my best to try to answer your questions.
It sounds like you have 2 different problems:
- paper cupcake liners coming off the cupcakes – when the cupcakes stay moist and tender
- cupcakes drying out too quickly – when the cupcake papers do not peel away
It sounds like what you need is a careful balance between the 2 problems in order for the cupcakes to be desirably tender but not so moist that the papers peel away.
It also sounds like you have experienced these problems with both the old convection oven and the new electric steam/convection oven. So getting a new oven has not helped solve the problem, unfortunately.
Here is what I can tell you from my own experience:
- I do not like to bake any type of cake or cupcake in convection ovens because convection ovens bake too hot and too fast, which causes cakes to dry out, as you have experienced.
- Also, the movement of the air circulating around the oven from the convection fan can also cause cakes to sink if the batter is fragile.
- To remedy this problem: I recommend baking cakes in conventional ovens. If you do not have access to a conventional oven in your bake shop, then try turning the convection oven temperature down by 25 degrees to bake the cupcakes a little slower. This may help alleviate some of the drying out problem.
- As for the cupcake papers pulling away from the cupcakes, this has been an ongoing topic of conversation on my blog for the past several years! Many bakers–both professional and amateur–have offered their suggestions for remedying this problem. I would recommend reading those suggestions both here and here to find some ideas that might be helpful in your situation.
I hope that helps! Best of luck to you.
|
|